
Hey STEAM students, do you know what time it is? I do! It’s time for us to learn another lesson in the Autodesk Inventor Tutorial Series! Let’s learn how to create a new project!
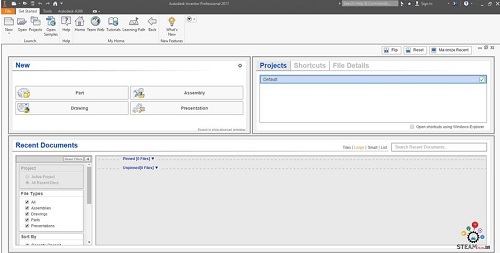
Step 1: To start with, your screen looks like this. You are on the “Get Started” tab next to “File” on the far left top menu.
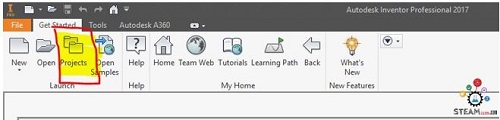
Step 2: Click “Projects” on the top left menu.
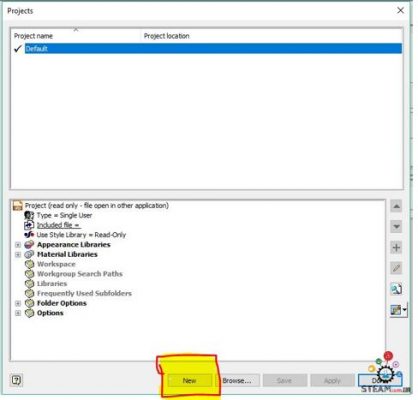
Step 3: Click “New” at the bottom of the project menu.
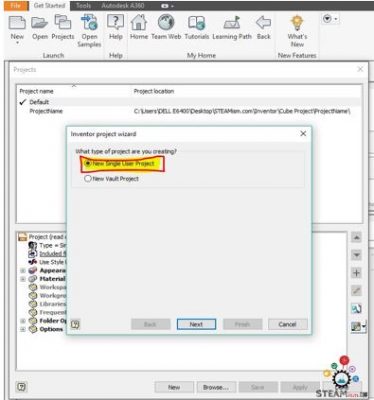
Step 4: Choose “New Single User Project”. These are the default project type and all files will be stored in the selected folder and its subfolders. The “Vault project”, on the other hand, stores files in a vault.
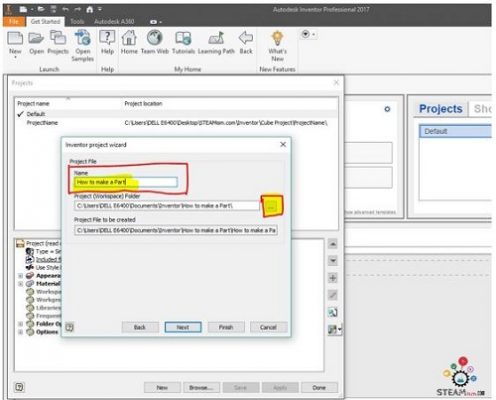
Step 5: Name your new project and click on the 3 little dots under “Project (Workspace) Folder” to select where you will save your project and its files.
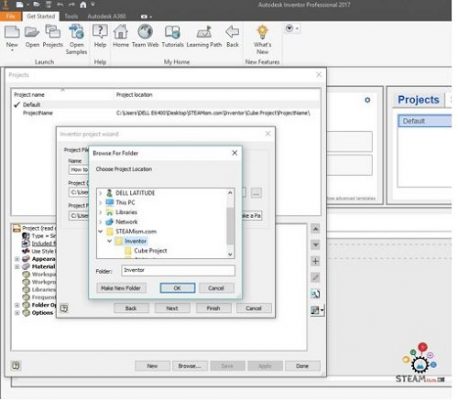
Step 6: Select the folder where you’ll save your project and its files. We recommend creating a new folder to keep each project separate. Click “Finish” when you’re done.
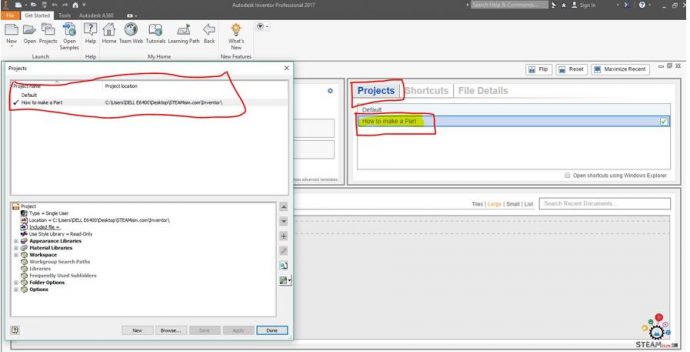
Step 7: And you have a new project! Great job so far. Watch our next post to get started making parts!
Links:
- New to the series? If you need to review what CAD and Autodesk Inventor are, or can do, Lesson 1 of the Autodesk Inventor Tutorial series is where you start!
- Ready to learn Autodesk Inventor with some quick, easy lessons?, Now you can, beginning with downloading and installing Inventor – Lesson 2 of the Autodesk Inventor Tutorial series can help!
- Inventor installed and ready to go? Let’s get started then! Click on Lesson 3 of the Autodesk Inventor Tutorial series to learn how to create a new project.
- Learn more at Autodesk’s website
- Watch a slideshow of Lesson 3 at slideshare.net
- Prefer watching videos? We have you covered – subscribe to our YouTube channel and watch the video for Lesson 3 and other lessons.
As a high school senior and co-founder of STEAMism and TimeforAI.com, Ani enjoys challenges and problem solving, technical subjects including Artificial Intelligence and Engineering Design, and collaborating with like-minded peers on events and hackathons. He has interned with the City of Austin, was a NASA High School Aerospace Scholar in 2019-2020 and is a Math tutor at Mathnasium. He has been blogging since 2nd grade and dabbles in web design and coding. He enjoys STEM subjects and teaching, so STEAMism is a great way for him to combine both.
Latest posts by Aniruddha Pochimcherla (see all)
- An Interview with the Co-Founders of Dermanostix - August 14, 2020
- NASA & SpaceX’s Successful Space Launch - June 12, 2020
- Types of Engineering - June 10, 2020