
Hi STEAMers, it’s good to e-meet you again! Ready to learn another cool skill on AutoDesk Inventor? Let’s “Fillet” today!
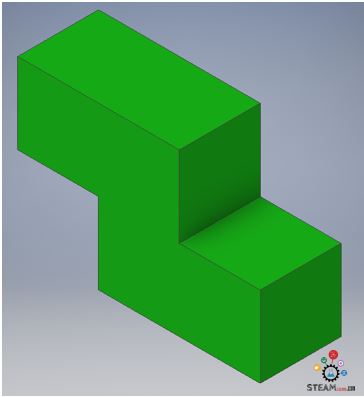
Step 1: Go ahead and open the 1st “Part” we made together (It looks like a Z). If you haven’t done so yet, open up this link: Autodesk Inventor Tutorial Series – Lesson 4. It’ll be quick and easy, and you’ll enjoy it, I promise!
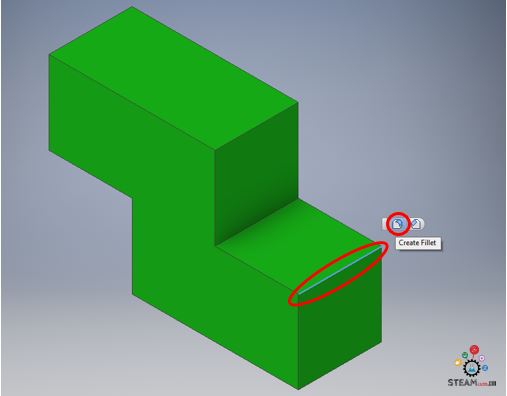
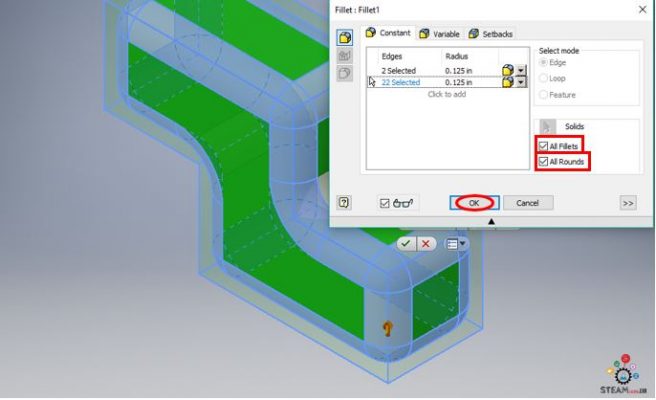
Step 2: Choose any “Edge” on the “Part” and Click on “Create Fillet”.
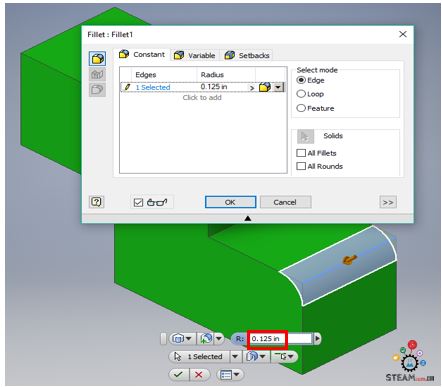
Step 3: Set the “Radius” (0.125 in).
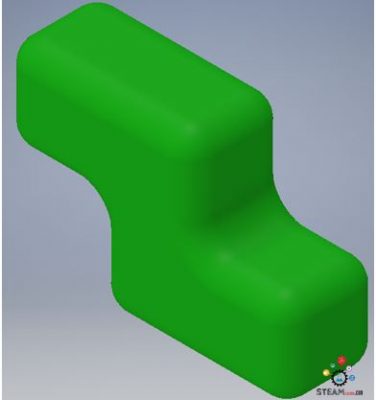
Step 4: Choose “All Fillets” and “All Rounds” under “Solids” or Click on all the “Edges” and vertices you see on your “Part”. Click “OK”.
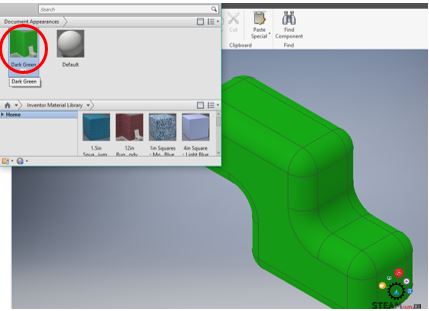
Step 5: Color the entire “Part” (“Dark Green”). If you don’t remember how do this, use the optional steps in Lesson 4 to guide you.
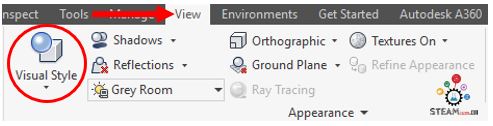
Step 6: On the menu, go to “View” and Click on “Visual Style”.
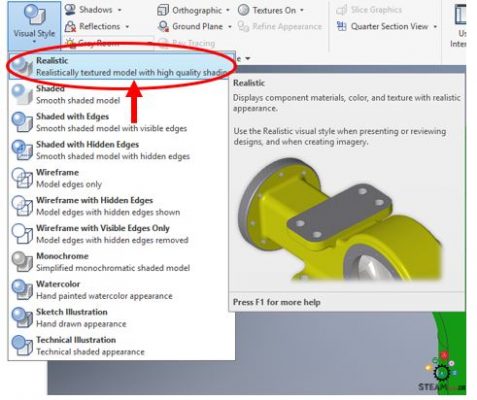
Step 7: Click on “Realistic”.
Step 8: And ta-da! We did it! Hooray! Oh wait… just 1 more step! And an important one!
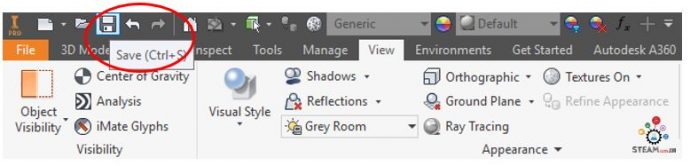
Step 9: Last step! Don’t forget to save! Now you can show off your new skill to the world!
As a high school senior and co-founder of STEAMism and TimeforAI.com, Ani enjoys challenges and problem solving, technical subjects including Artificial Intelligence and Engineering Design, and collaborating with like-minded peers on events and hackathons. He has interned with the City of Austin, was a NASA High School Aerospace Scholar in 2019-2020 and is a Math tutor at Mathnasium. He has been blogging since 2nd grade and dabbles in web design and coding. He enjoys STEM subjects and teaching, so STEAMism is a great way for him to combine both.
Latest posts by Aniruddha Pochimcherla (see all)
- An Interview with the Co-Founders of Dermanostix - August 14, 2020
- NASA & SpaceX’s Successful Space Launch - June 12, 2020
- Types of Engineering - June 10, 2020