
Hey STEAMheads, ready to learn some more Autodesk Inventor?
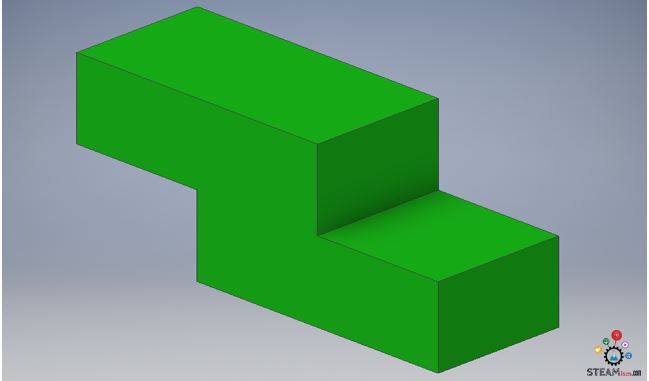
What say, we make a new part today that looks like this? Well, gear up for some quick and easy fun. As always, our goal is short, sweet, and to-the-point, so we’ll try to keep this to something you can do in 5 spare minutes. If you run into any trouble, please use the comments section to ask – I am always happy to help!
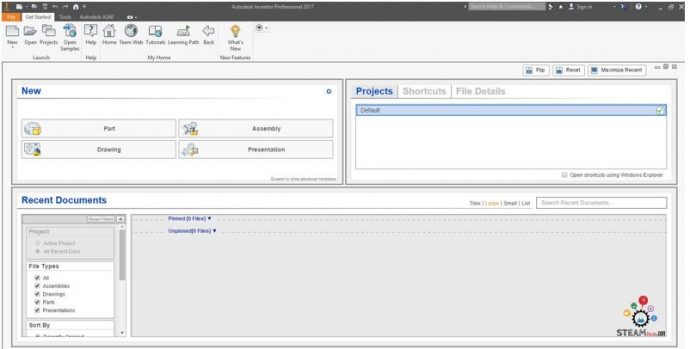
Step 1: Open Inventor – we’ll start with the default “Get Started” screen.
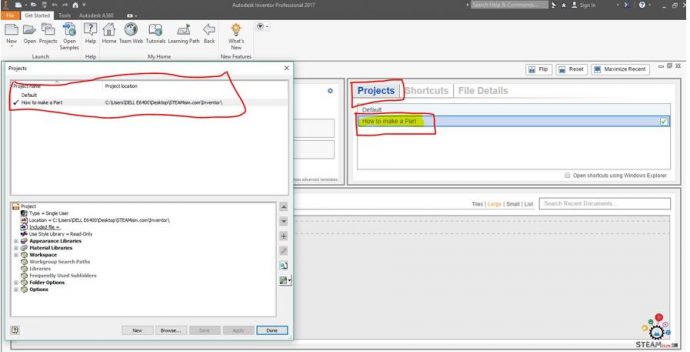
Step 2: Create a new “Project” (here’s my “Autodesk Inventor Tutorial Series – Lesson 3 – How to Create a New Project” post, if you need help with that. This should take you 2-3 minutes to learn, I promise.).
Step 7: And you have a new project! Great job so far. Watch our next post to get started making parts!
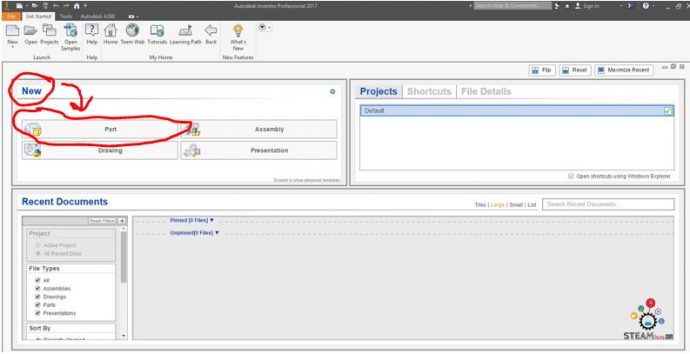
Step 3: Click “Part”.
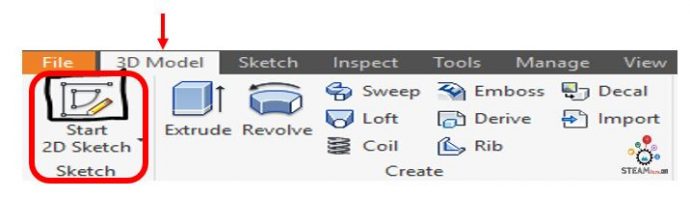
Step 4: On the far left top menu, under 3D model, click “Start 2D Sketch”.
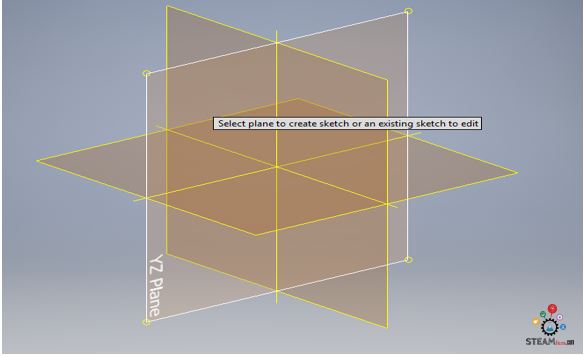
Step 5: Choose the default plane (YZ). Let’s not complicate this too much yet!
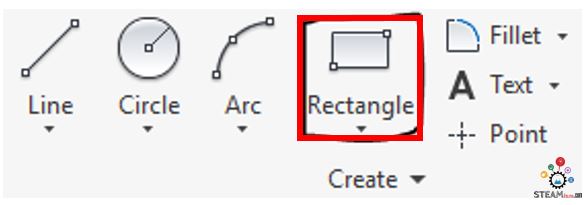
Step 6: Choose object to sketch (“Rectangle”).
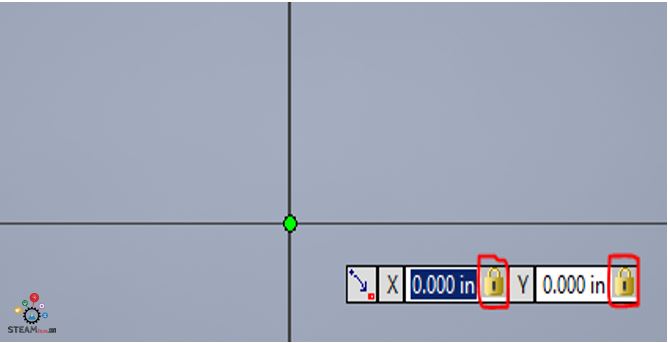
Step 7: Choose the default coordinates (0, 0).

Step 8: Lock in the Coordinates (if needed) at (0,0) by pressing the tab button & typing 0 in X & Y.
Step 9: Make a 2D sketch as shown by dragging your mouse or trackpad. We’re starting with the shape we chose in Step 6 – a rectangle. Don’t worry about exact dimensions yet. Just make a rectangle.
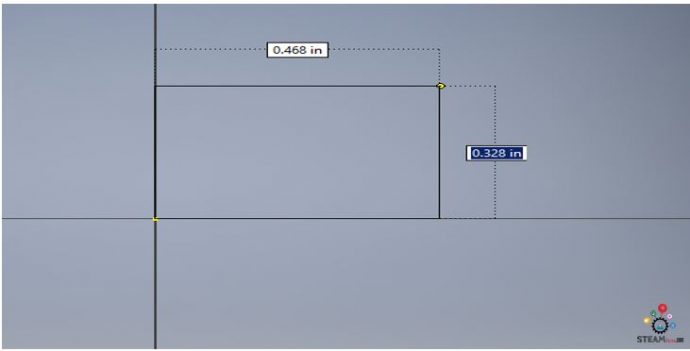
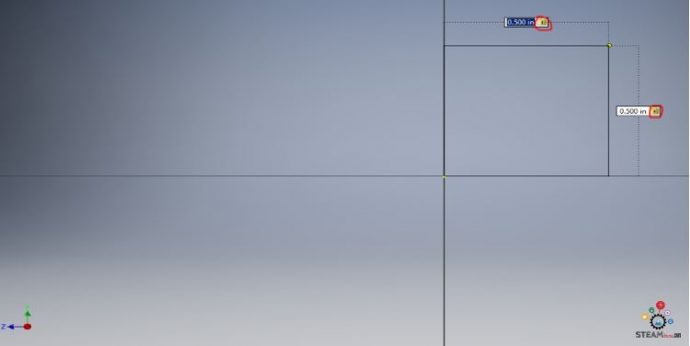
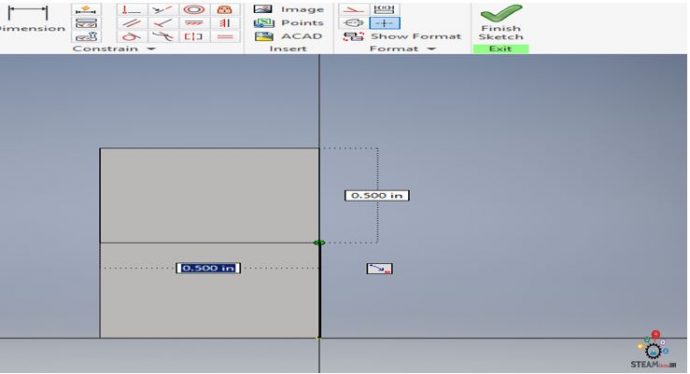
Step 10: Lock in the Sketch by pressing the tab button & changing the height & width (0.5).
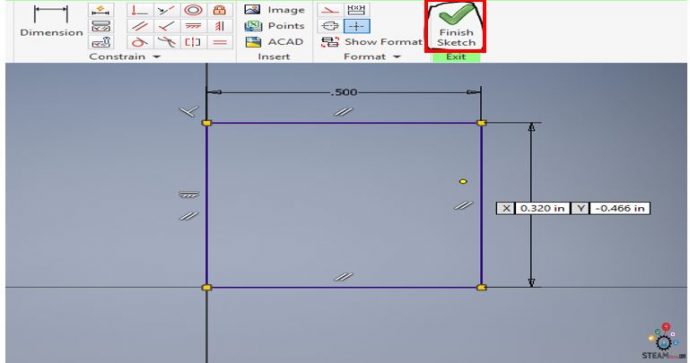
Step 11: Click “Finish Sketch”.
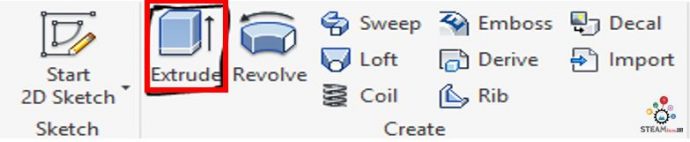
Step 12: Now, click “Extrude” as shown below.
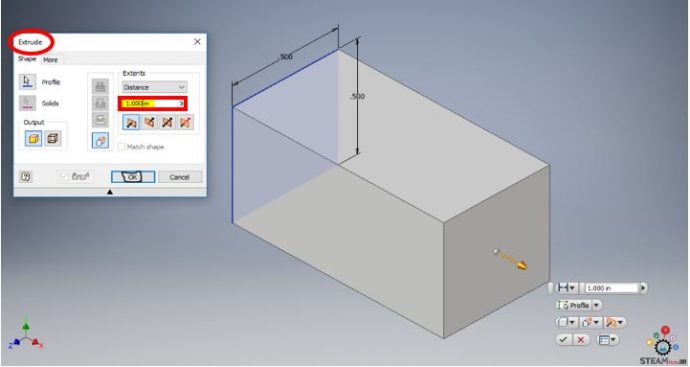
Step 13: Choose “Distance” to “Extrude”. Let’s say 1 in. for this example.
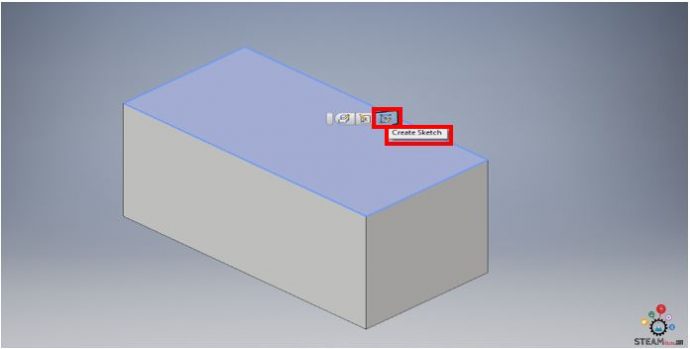
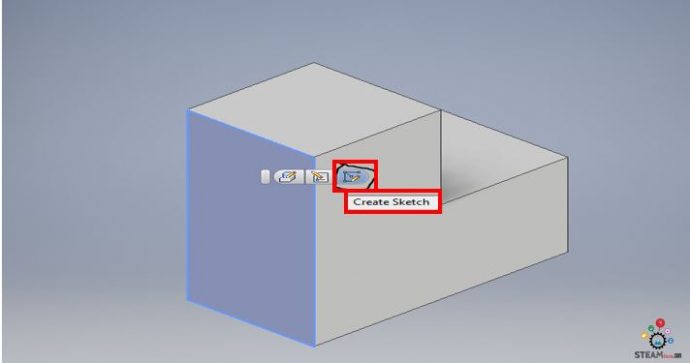
Step 14: Click “Create Sketch” now, as shown in the screenshot.
Step 15: Let’s make another Sketch now. There is a point to it, I promise! We’re only 3 steps away from our first part!
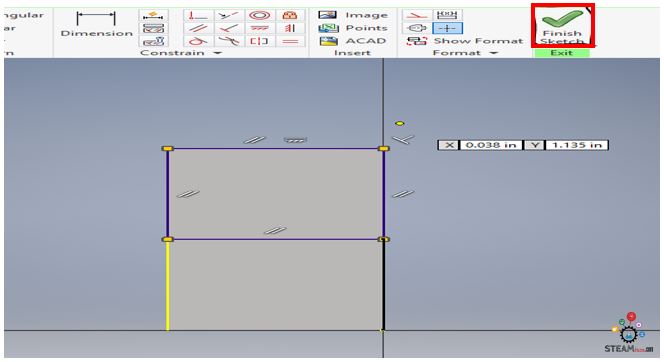
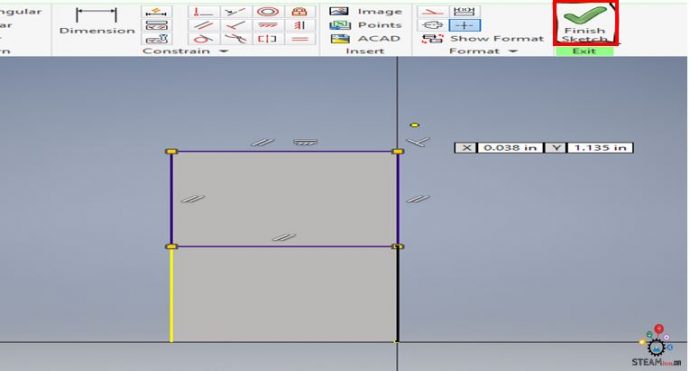
Step 16: Click “Finish Sketch” as shown.
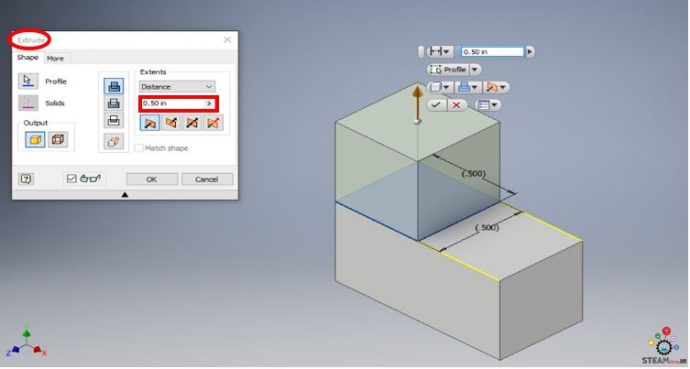
Step 17: Click “Extrude” & Choose “Distance” to “Extrude”, in this case, let’s say 0.5 in.
Step 18: Click “Create Sketch” on the back.
Step 19: Next, make another Sketch & click “Finish Sketch”.
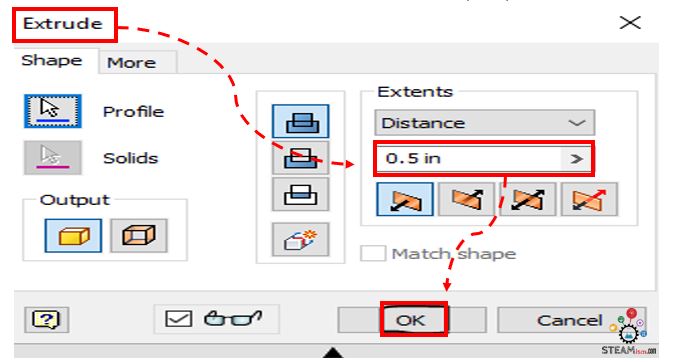
Step 20: Now, one more time – click “Extrude” & Choose “Distance” to “Extrude”, this time let’s set that at 0.5 in. And click OK.
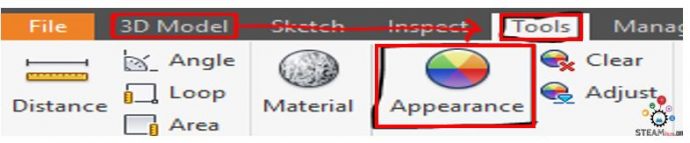
Step 21: This is totally optional, skip this if you want to see your first part now. Or in 3 more steps, let’s make your part look better. Go to “Tools” and Click “Appearance”.
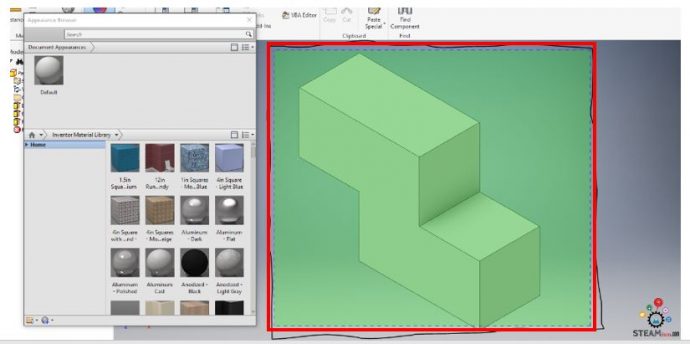
Step 22: Also optional, let’s highlight our part.
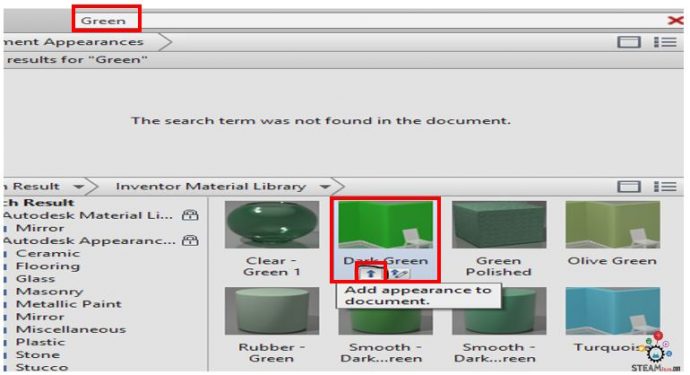
Step 23: Search for the color green, and select the color “Dark Green” from the results.
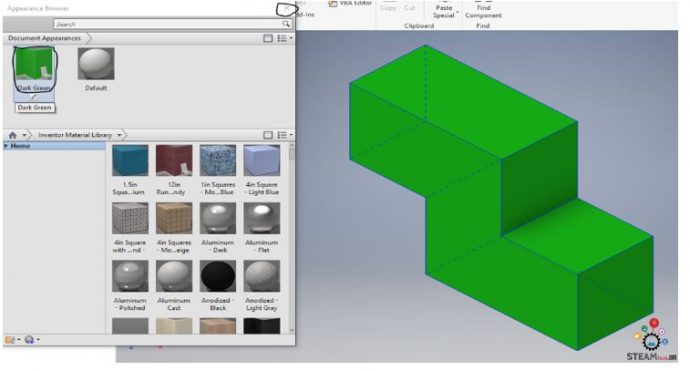
Step 24: Aaaaand….there you have it, your first part! It’s magic! No, not really magic – you made this yourself and it only took you 23 easy to follow steps, didn’t it? Congratulations!
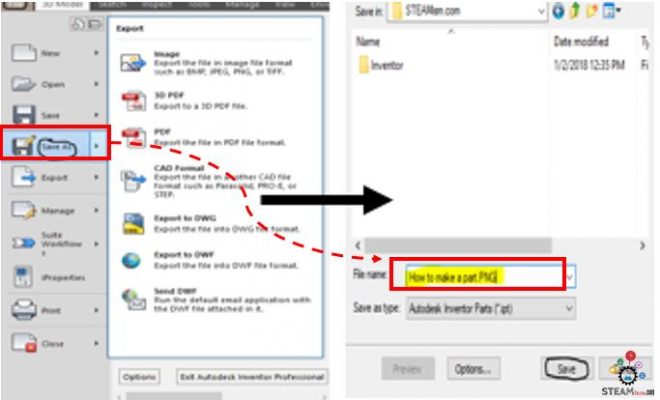
Step 25: Before you go off to celebrate, click “Save As” & “Save” your new part!
Step 26: And, now, fellow “Inventors”, go show off your new part to the world and enjoy your fame! See you in the next tutorial (coming soon, I promise!)
Links:
- If you need to review what CAD and Autodesk Inventor are, or can do, Lesson 1 of the Autodesk Inventor Tutorial series can help!
- Ready to download and install Autodesk Inventor? You’re in luck if you are a student or educator! Lesson 2 of the Autodesk Inventor Tutorial series can quickly walk you through the steps.
- Inventor installed and ready to go? Let’s get started then! Click on Lesson 3 of the Autodesk Inventor Tutorial series to learn how to create a new project.
- Learn more at Autodesk’s website
- Prefer watching videos? We have you covered – subscribe to our YouTube channel and watch some of our videos.
As a high school senior and co-founder of STEAMism and TimeforAI.com, Ani enjoys challenges and problem solving, technical subjects including Artificial Intelligence and Engineering Design, and collaborating with like-minded peers on events and hackathons. He has interned with the City of Austin, was a NASA High School Aerospace Scholar in 2019-2020 and is a Math tutor at Mathnasium. He has been blogging since 2nd grade and dabbles in web design and coding. He enjoys STEM subjects and teaching, so STEAMism is a great way for him to combine both.
Latest posts by Aniruddha Pochimcherla (see all)
- An Interview with the Co-Founders of Dermanostix - August 14, 2020
- NASA & SpaceX’s Successful Space Launch - June 12, 2020
- Types of Engineering - June 10, 2020